Crochet Design
etsy - designs by kelsey kay
etsy - designs by kelsey kay
See More Patterns on my Etsy Shop!
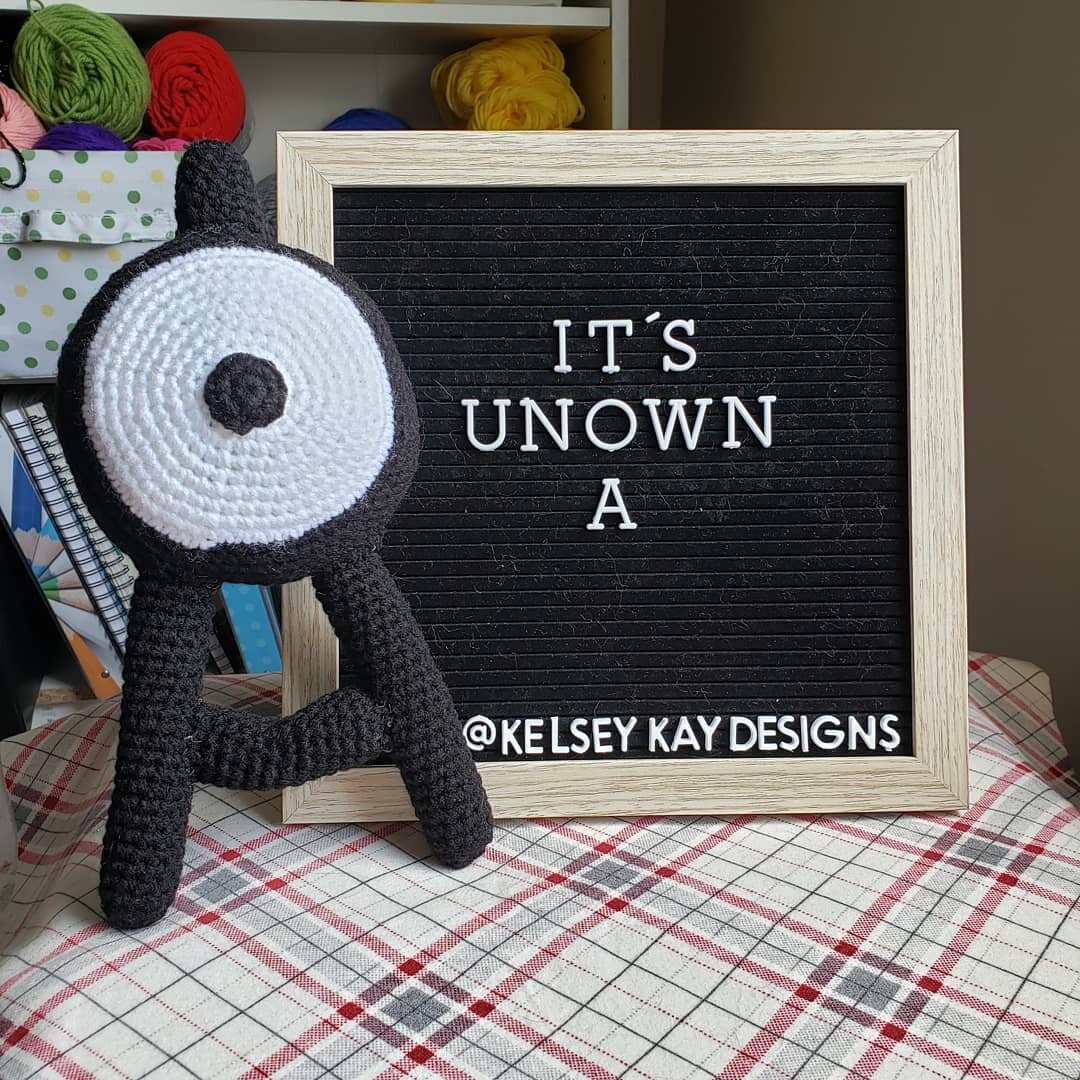
Amigurumi Unown ‘a’ pokemon
Enjoy this free crochet pattern of Unown ‘A’ from Pokemon. I designed this pattern to accommodate crochet skills of every level.
About this Pattern
This pattern uses continuous rounds. To keep track, I recommend using some type of stitch marker.
Finished Amigurumi will measure around 10.5 inches.
Size may vary based on yarn choice and stitch tension.
Repeat instructions will be marked with ( ) followed by the number of repeats.
Ex: (sc 2, inc) x6
Important Information
This pattern is property of Kelsey Arras owner of Kelsey Kay Designs.
You may not claim this pattern as your own.
You may not alter, copy, sell, or redistribute this pattern in whole or in part. This pattern is intended for personal use only.
If you publish photos of items made from this pattern I ask that you please give me credit as the original designer of the pattern.
Yarn Colors (medium)
Black
White
Other Materials/ Tools
G Hook (4.0mm)
Fiber-fil stuffing
Tapestry needle
Scissors
Sewing Pins
Abbreviations
Ch = Chain
MR = Magic Ring
Sc = Single Crochet (sc 1 in the next sc)
inc = Increase (sc 2 in the next sc)
dec = Decrease
sl st = Slip Stitch
X = repeat
F/O = Fasten Off
Center Eye (in black)
R1: MR 6 [6]
R2: Inc x6 [12]
Sl st and f/o leave long tail for sewing
*sew to middle of head area before stuffing the head. See fig. 5
Head (start in white)
R1: MR 6 [6]
R2: inc ×6 [12]
R3: (sc, Inc) x6 [18]
R4: (sc, Inc, sc) x6 [24]
R5: (sc 3, inc) x6 [30]
R6: (sc 2, Inc, sc 2) x6 [36]
R7: sc 5, Inc x6 [42]
R8: (sc 3, Inc, sc 3) x6 [48]
R9: (sc 7, inc) x6 [54]
R10: (sc 4, Inc, sc 4) x6* [60]
*uses last sc to start color change row
R11: sc around color change half row w/black* [60]
*See figures 1-4
In black, F/0 white
R12: (sc 9, Inc) x6 [66]
R13: (sc 5, Inc, sc 5) x6 [72]
R14-16: sc around (3 rounds) [72]
R17: (sc 5, dec, sc5 ) x6 [66]
R18: (sc 9, dec) x6 [60]
R19: (sc 4, dec, sc 4) x6 [54]
R20: (sc 7, dec) x6 [48]
R21: (sc 3, dec, sc 3) x6 [42]
R22: (sc 5, dec) x6 [36]
R23: (sc 2, dec, sc2) x6 [30]
R24: (sc 3, dec) x6 [24]
R25: (sc, dec, sc) x6* [18]
*Start stuffing
R26: (sc, dec) x6 [12]
R27: dec x6 [6]
Sl st and F/O closing the opening
Notes: Do not overstuff the shape, you want it to remain a saucer.
Top of ‘A’ Shape
R1: MR 6 [6]
R2: Inc x6 [12]
R3-5: sc around [12]
R6: (sc 3, inc) x3 [15]
R7: sc around [15]
sl st f/o leave tail
‘A’ Leg Shapes (stuff as you go)
R1: Mr 6 [6]
R2: inc x6 [12]
R3-24: sc around (22 rounds) [12]
sl st f/o leave tail
Connecting ‘A’ curve
R1: ch 12, sl st with first ch [12]
R2-5: sc around [12]
R6: inc 4, dec 4 [12]
R7-12: sc around [12]
f/o do not close
stuff and shape the curve
Assembly
Sew eye in middle of white space
pin, stuff, and sew top of ‘A’ shape with a tapestry needle
Match the top of the ‘A’ angle with the legs. Pin and sew
Attach middle ‘A’ piece halfway down the leg space. See examples
Assembly Images
Figure 1
Figure 2
Figure 3
Figure 4
Thank You!
To check out more of my crochet work you can visit my Instagram at KelseyKayDesigns


